How to Clean Headlights: Wash, Polish and Seal Them Clear
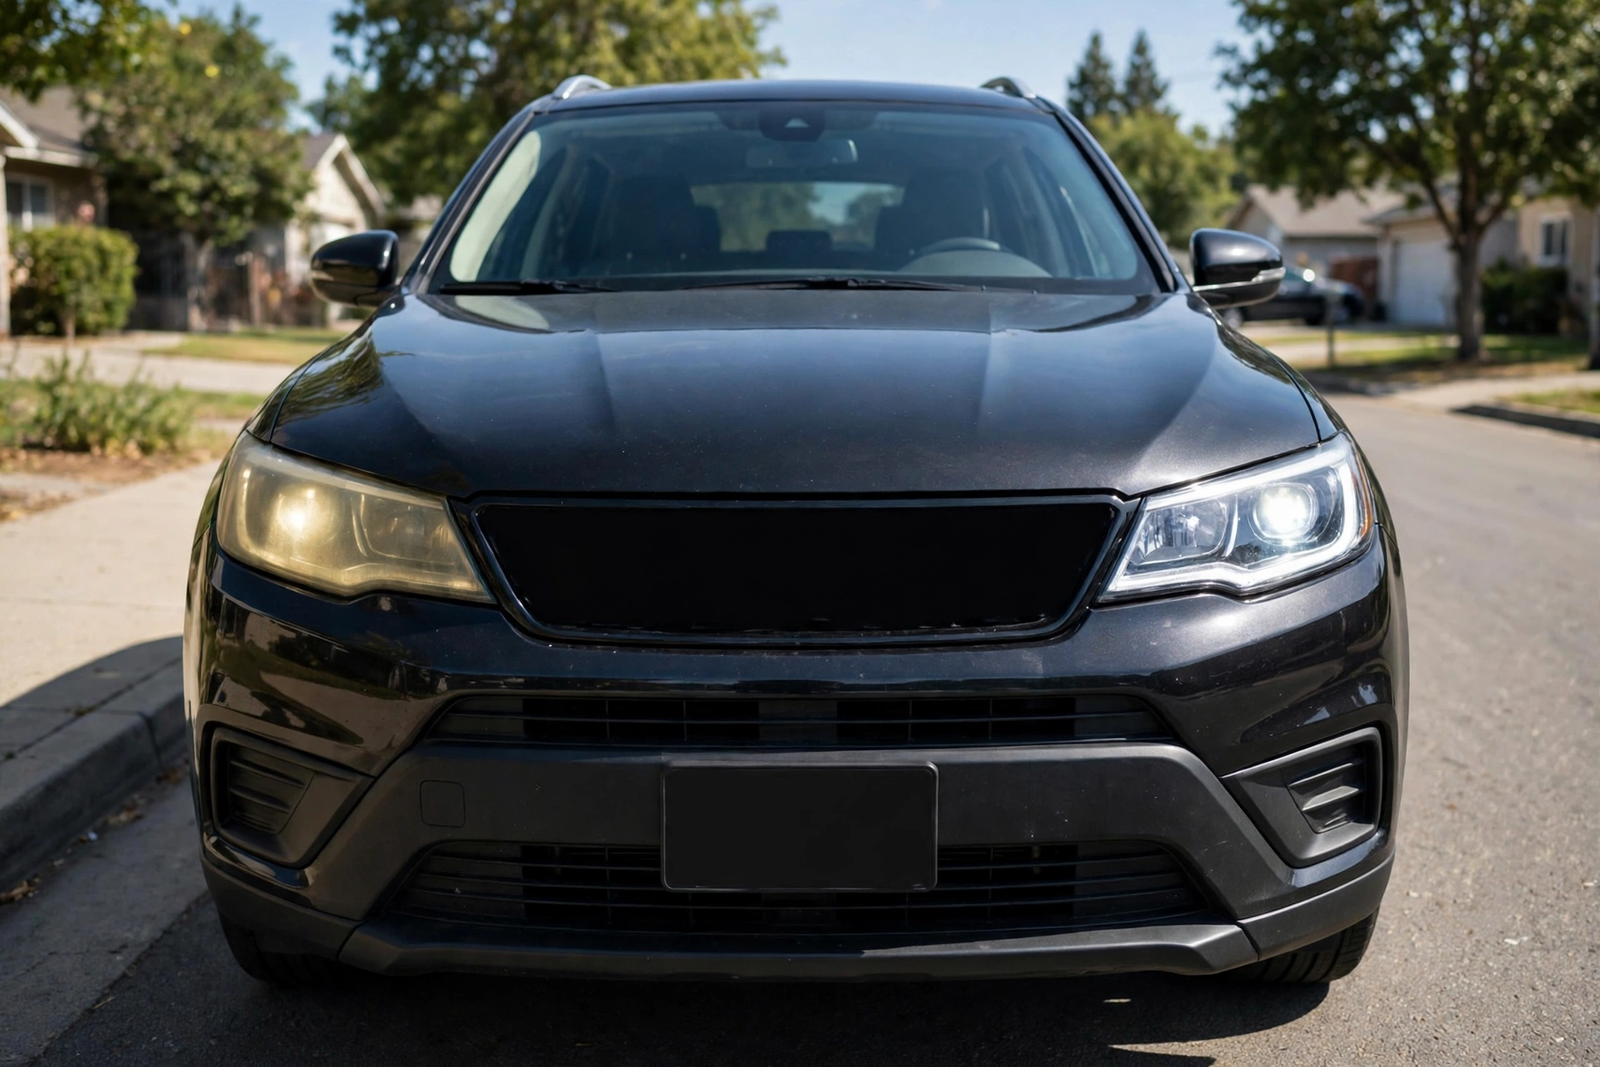
Learning how to clean headlights at home is worth the effort, because cloudy headlights are not just a cosmetic problem. The plastic lens over a headlight slowly turns yellow and hazy as sunlight, road grime and heat wear away its factory coating, and a hazy lens scatters the beam instead of sending it down the road. Most cloudy headlights can be cleaned at home with a plastic polish, a restoration kit and a UV coating — no new housings, no body shop visit.
The short answer: wash the lens first, then polish it with Meguiar’s PlastX to clear the haze, restore deeper yellowing with the Chemical Guys ceramic kit if the polish alone is not enough, and finish with Meguiar’s Keep Clear coating so the clarity lasts. That wash-polish-seal order is how to clean headlights properly, and this guide walks through each step, the mistakes to avoid, and when cleaning alone will not fix the problem.
As an Amazon Associate I earn from qualifying purchases.
Quick Pick: How to Clean Headlights
Table of Contents
Meguiar’s PlastX: The Cleaner and Polish Step
The Meguiar’s PlastX is the first product to reach for when learning how to clean headlights, because it is the cleaning step itself. It is the Meguiar’s PlastX Clear Plastic Cleaner & Polish, model G12310, in a 10 oz bottle, and it is a plastic cleaner and polish in one: a rich gel formula that removes light defects and restores optical clarity to clear plastics. The listing says it removes scratches, cloudiness, yellowing and oxidation from headlights, taillights and soft-top windows, and it is made for rigid and flexible clear plastics.
PlastX is a polish, not a sanding kit, which is exactly why it suits the cleaning job. Work a small amount onto a foam applicator pad or a microfiber towel, rub it into the lens in firm overlapping circles, and wipe it off to see the haze lift. For lightly cloudy headlights this one bottle is often the whole job — wash, polish, wipe, done. The scratch, cloudiness and yellowing removal is the listing’s claim, not a measured result — no polish was tested for this guide.
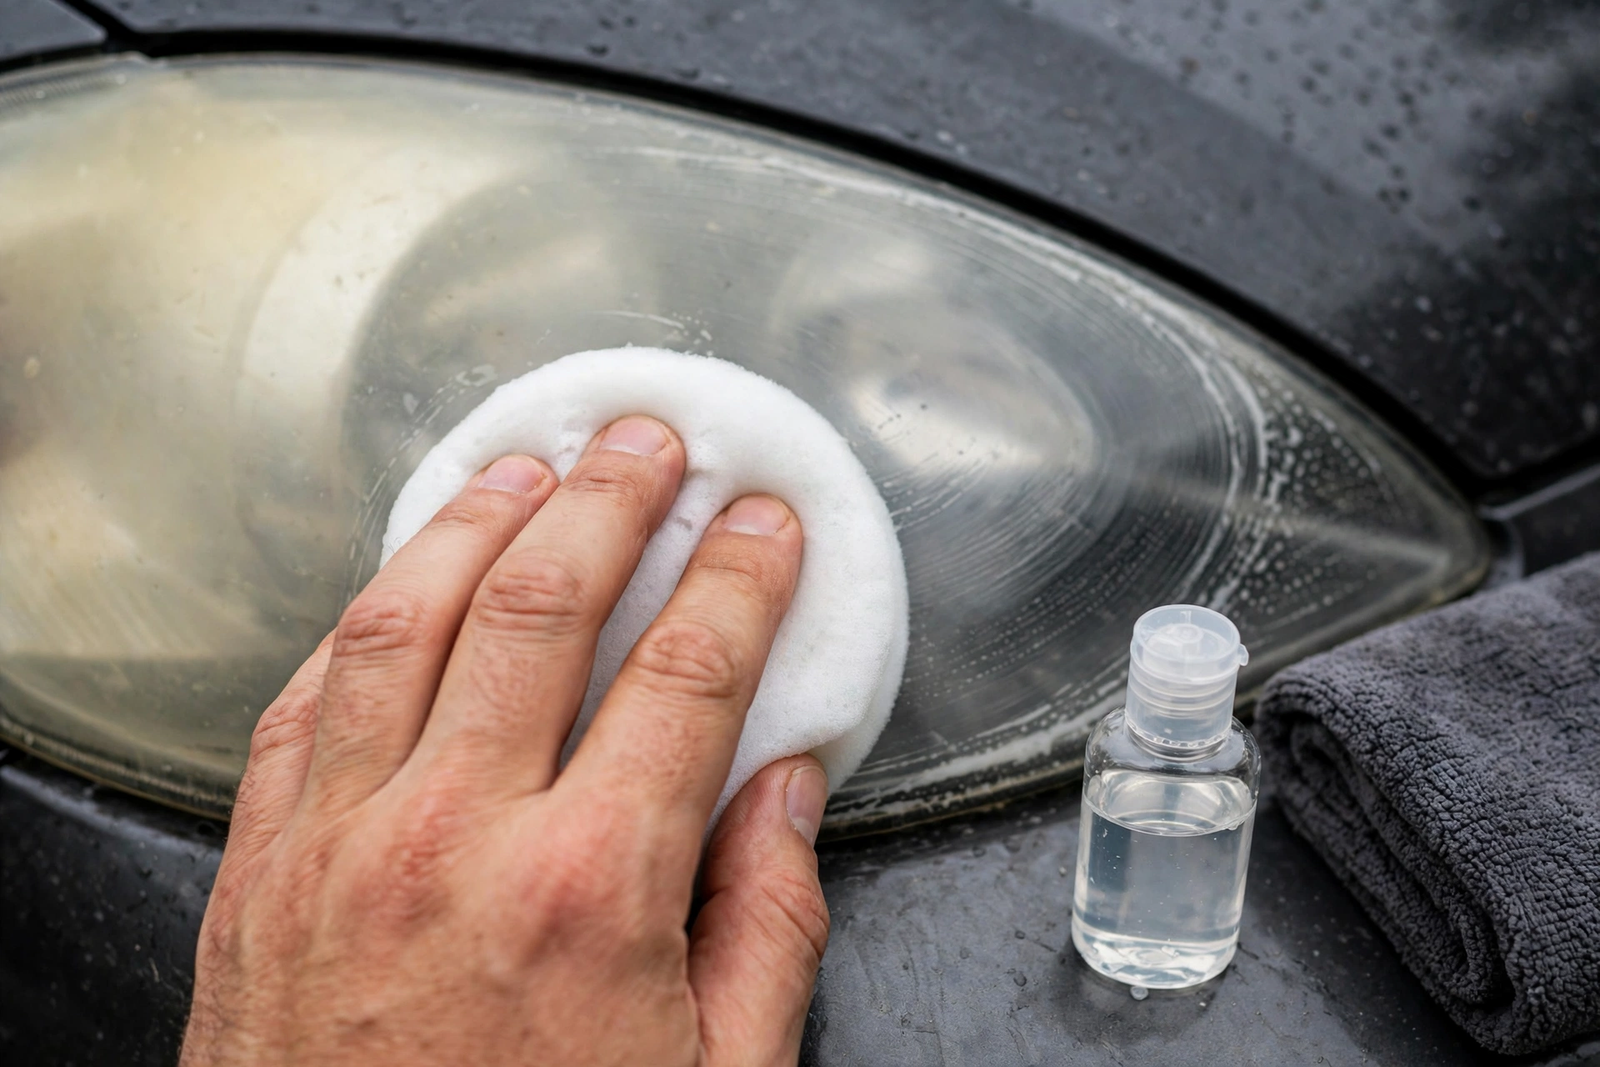
The PlastX is the pick in this guide for headlights that are hazy or lightly yellowed and have never been cleaned before. It suits a hand application on the car, with no tools and no masking beyond protecting the paint around the lens. One honest flag belongs here: the listing crawl for this one is 210 days old, and no live-offer evidence was found for it, so the offer status is unconfirmed rather than confirmed. The identity is verified — model G12310, 10 oz, on amazon.com — but confirm the listing shows a live offer before you order.
Meguiar’s PlastX Clear Plastic Cleaner & Polish, Fast & Easy Plastic Restorer for Headlights, Taillights, Soft Top Windows, and More, Remove Scratches, Cloudiness, Yellowing, and Oxidation, 10 oz on Amazon: plastic cleaner and polish, model G12310, 10 oz, removes scratches, cloudiness, yellowing and oxidation, hand application. Live offer unconfirmed — check the listing before ordering.
Buy the PlastX if: your headlights are hazy or lightly yellowed and you want the simplest cleaning step, applied by hand with no tools. Check the live offer before ordering.
Chemical Guys Ceramic Kit: Restore and Seal in One Box
The Chemical Guys Headlight Restoration & Ceramic Kit is the step up when a polish alone is not enough. It is a complete DIY kit for removing yellowing and oxidation, and it pairs two products in one box: a 4 oz Headlight Restoration Compound and a 4 oz HydroCharge+ Ceramic Coating Spray, plus a microfiber towel, a MicroSuede applicator and a dual-sided Hex-Logic foam pad. The listing says the kit restores clarity and removes oxidation from dull, yellowed headlights, and that the ceramic coating seals in protection to help prevent future yellowing.
The two steps run in order. First the restoration compound goes on the foam pad and is worked into the lens to remove oxidation and haze; then the HydroCharge+ ceramic coating spray is applied with the MicroSuede applicator to seal the surface. Chemical Guys says the ceramic coating bonds to the polycarbonate and should be reapplied periodically to maintain protection — that is the maker’s claim, not a tested result, and no durability figure is stated here as a measured fact.
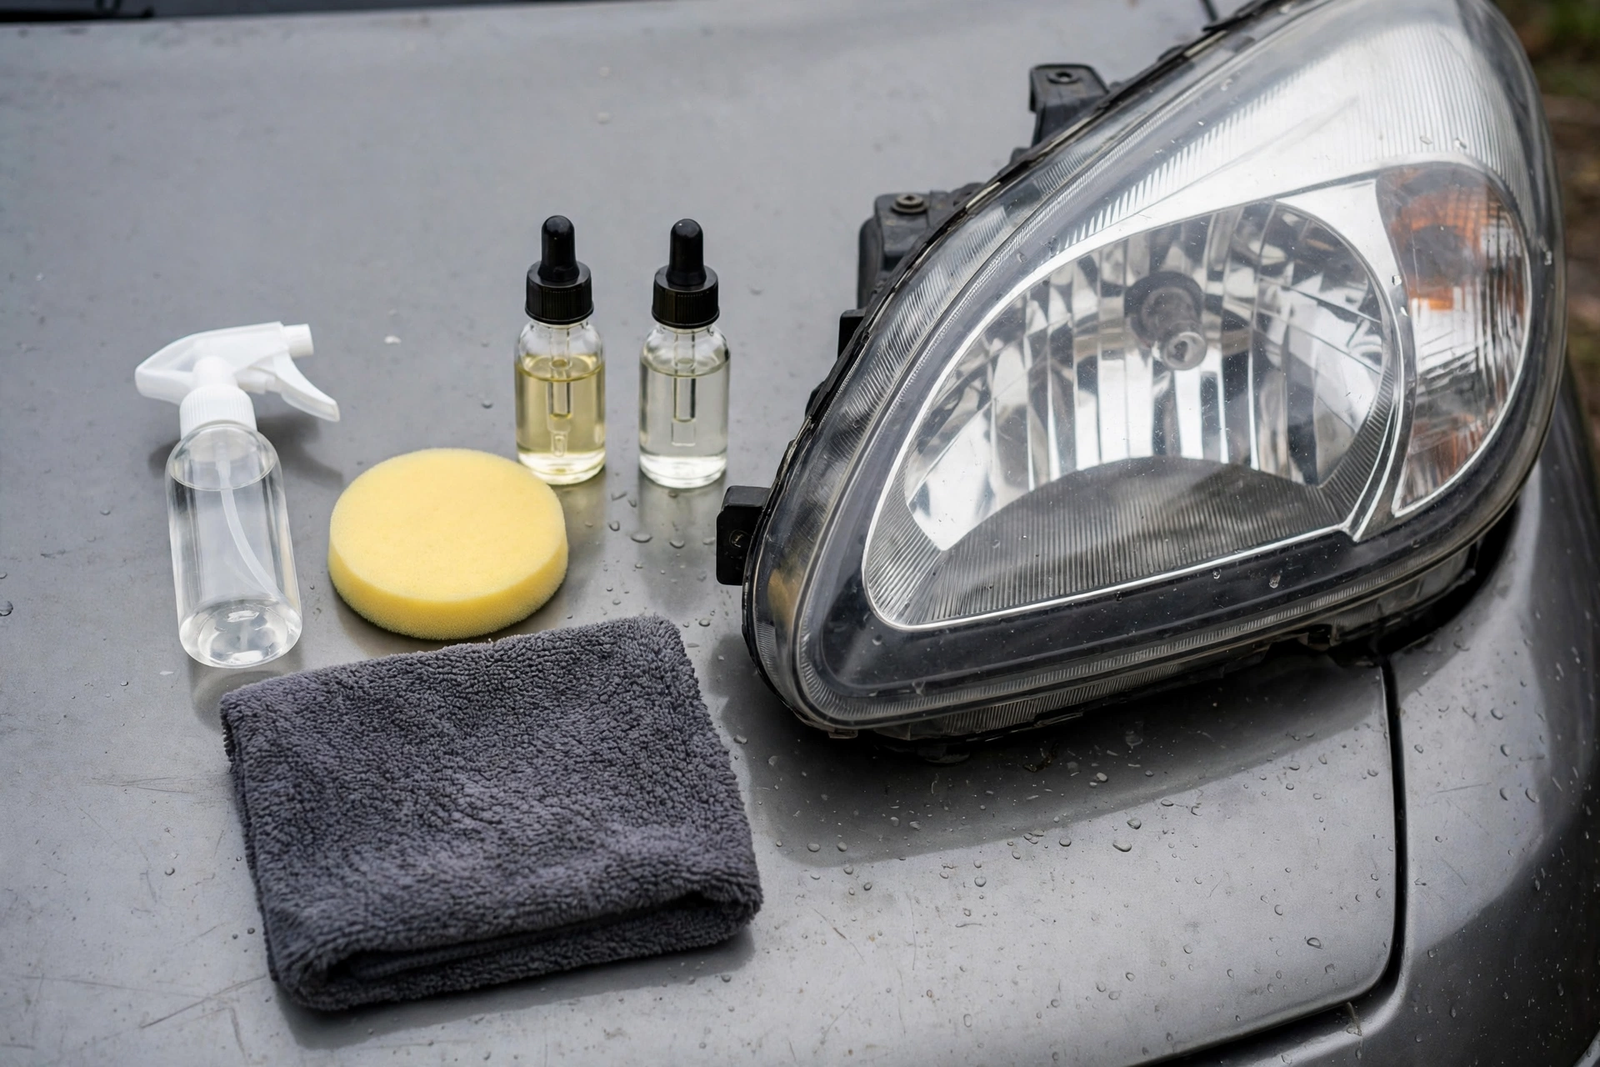
This kit is the pick in this guide for headlights with deeper yellowing, where the PlastX polish alone leaves haze behind. It is also a different product from the three restoration kits in the best headlight restoration kits roundup on this site — those are compared as a buying guide, while this guide uses one kit as a step inside a cleaning process, alongside a cleaner-polish and a UV coating. The same honest flag applies here as to the PlastX: the crawls of this listing showed no featured offers available at the time they were read, which means the listing may have no live offer right now, or the offer may simply not have shown in the crawl. Check that the listing shows a live offer before you order.
Chemical Guys Headlight Restoration & Ceramic Kit, Complete DIY Kit for Removing Yellowing & Oxidation, Includes Restoration Compound, HydroCharge With Microfiber & Applicator on Amazon: 4 oz restoration compound, 4 oz HydroCharge+ ceramic coating spray, microfiber towel, MicroSuede applicator, dual-sided Hex-Logic foam pad. No featured offers showed in the crawls — check the live offer before ordering.
Buy the Chemical Guys kit if: your headlights are deeply yellowed and a polish alone leaves haze behind, and you want the restore step and the ceramic seal in one box. Confirm the listing shows a live offer first.
Meguiar’s Keep Clear: The UV Coating That Keeps Them Clear
The Meguiar’s Keep Clear Headlight Coating is the last step in how to clean headlights properly, and the step most drivers skip. It is the Meguiar’s Keep Clear Headlight Coating, model G17804, a 4 oz aerosol, and its job is protection, not cleaning: it maintains like-new clarity of headlights with an easy-to-use formula and UV protection. The listing says the coating lasts all year long, and the maker describes it as lab tested for a full year of protection — that is the maker’s claim, not a measured result.
Cleaning without sealing is a short-lived fix, because the same sunlight that yellowed the lens the first time is still hitting it every day. A freshly polished lens has little or no UV protection left on it, so the haze comes back faster than it did before. Spraying the Keep Clear coating over a clean, dry lens puts a UV barrier back on the plastic, and that barrier is what keeps the cleaning work from fading in a few months. It can also top up the factory coating on a new lens: a new lens has its factory coating intact, and a spray like this adds a UV layer over it rather than replacing it.
One more thing to know about the Keep Clear coating: the listing crawls for this one showed no featured offers available, and one crawl noted heavy recent buying activity, so the offer status is unconfirmed rather than confirmed. The identity is verified — model G17804, 4 oz aerosol, UPC 070382012656, on amazon.com — but confirm the listing shows a live offer before you order, the same as with the other two picks.
Meguiar’s Keep Clear Headlight Coating, Maintain Like-New Clarity of Your Headlights with an Easy-to-Use Formula and UV Protection that Lasts All Year Long, 4 Ounce Aerosol on Amazon: UV protection coating, model G17804, 4 oz aerosol, maintains like-new clarity with UV protection. No featured offers showed in the crawls — check the live offer before ordering.
Buy the Keep Clear coating if: you have just cleaned your headlights and want the clarity to last, or you want to protect new headlights before they yellow. Check the live offer before ordering.
How to Clean Headlights Step by Step
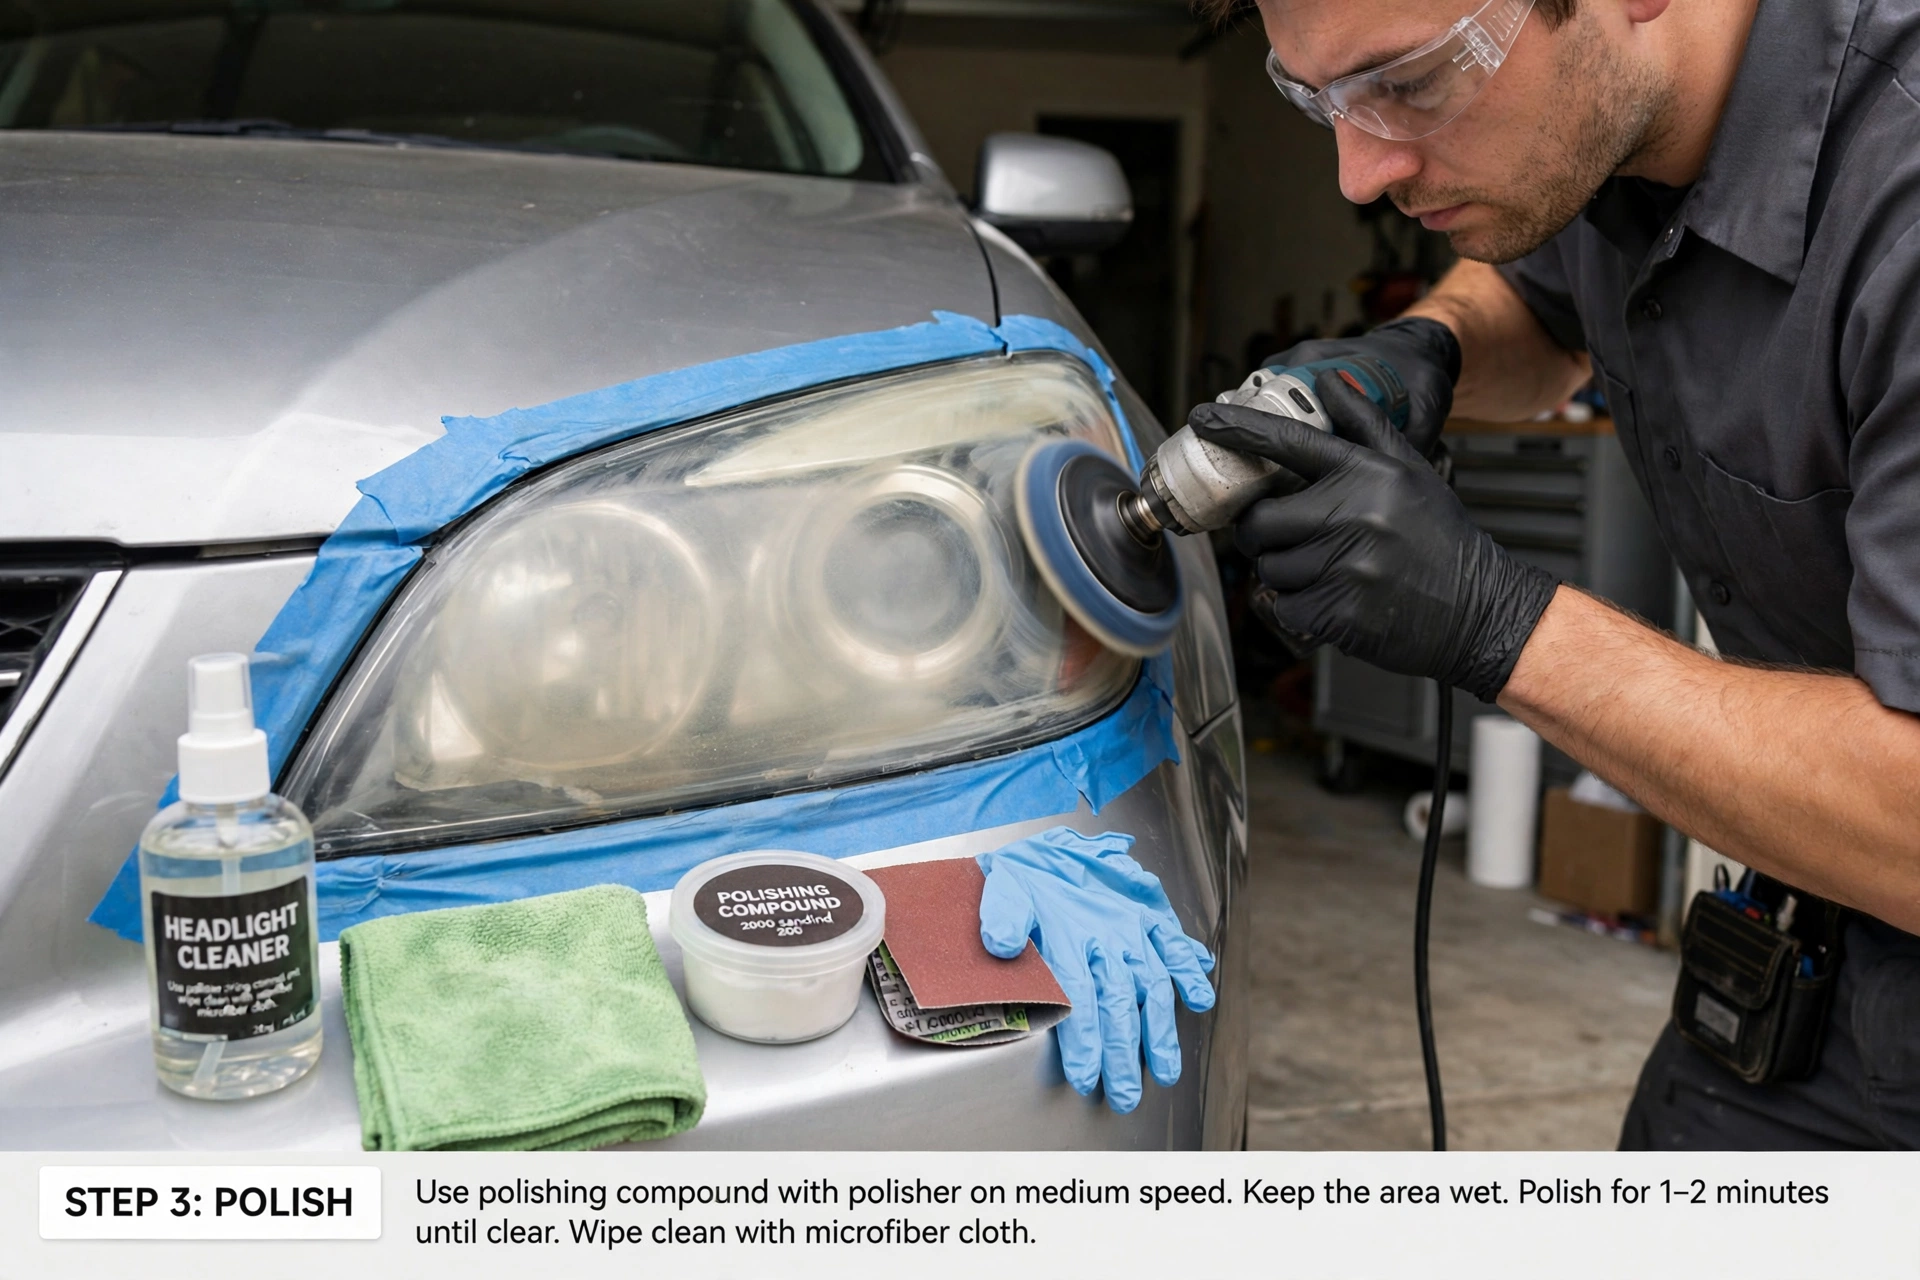
Start by washing the headlight and the paint around it. Use a proper car wash soap — our best car wash soap article covers the soaps that lift road film without stripping protection — and rinse the lens clean. Polishing a dirty lens grinds grit into the plastic, so the wash is not a nicety, it is the step that stops the cleaning from doing damage. Dry the lens fully before the next step.
Next, tape off the paint around the headlight with masking tape. Polish and coating overspray will mark paint and trim, and tape is cheap insurance. Then work the PlastX into the lens with a foam applicator pad in firm overlapping circles, a section at a time, and wipe it off with a clean microfiber towel. Inspect the lens in daylight after the first pass: if the haze is gone, the polish has done its job. If yellowing remains, move to the Chemical Guys kit and work the restoration compound the same way, then seal the lens with the HydroCharge+ ceramic spray.
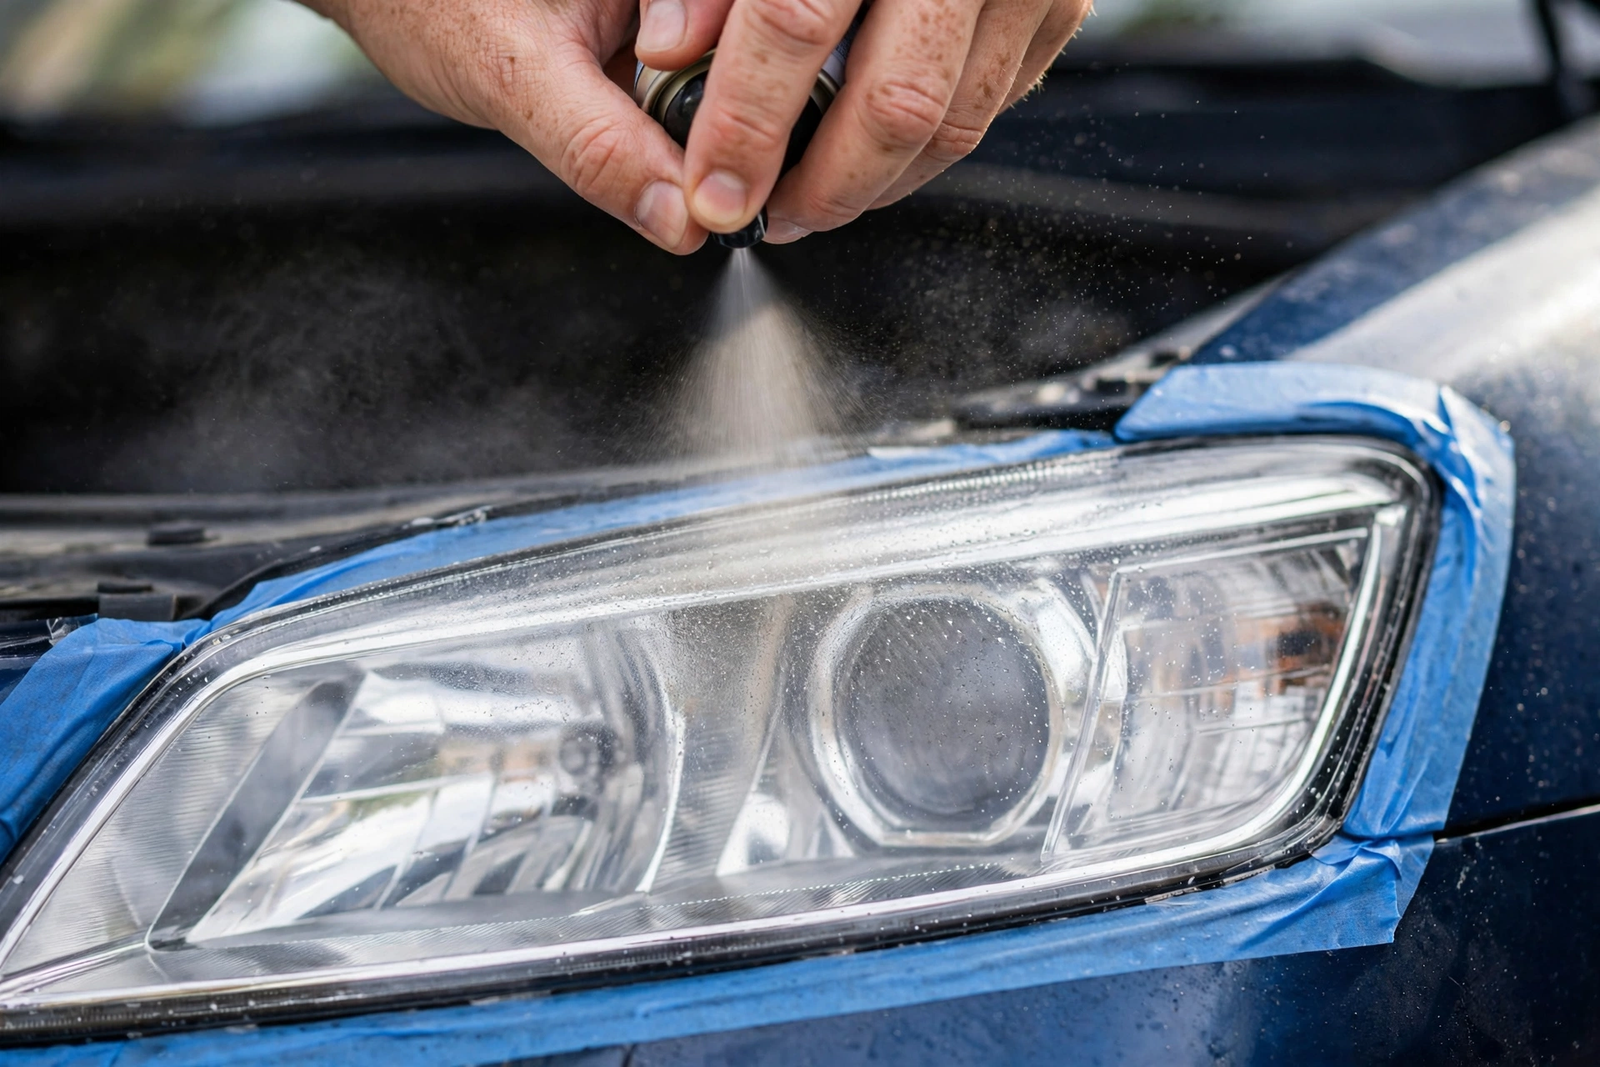
Finish with the Keep Clear coating. Spray it outdoors or in a well-ventilated space, in medium-wet, overlapping passes over the clean, dry lens — two coats, 3–5 minutes apart — and let it cure a full 24 hours before driving. Work in the shade on a cool lens: a hot lens dries polish and coating too fast and leaves haze instead of clarity. Do one headlight fully before starting the other, so you can compare the finished lens against the cloudy one and see whether the result is even.
Cleaning vs Restoring: When Each One Is the Right Job
Cleaning and restoring are two different jobs, and knowing which one your headlights need saves time and money. Cleaning is the light job: washing off road film and polishing away surface haze and light yellowing with a product like PlastX. Restoring is the heavy job: cutting through deep oxidation and thick yellowing with a compound, a sanding step, or a full kit. A headlight that looks dull in daylight but still shines a clean beam at night usually needs cleaning. A headlight that is yellow all the way through the plastic and throws a dim, scattered beam usually needs restoring.
The order is always cleaning first, restoring only if cleaning falls short. Polish the lens, inspect it, and only then decide whether the deeper step is needed — many headlights that look badly yellowed turn out to need a polish and a coating, not a full restoration. Knowing how to clean headlights means knowing which of the two jobs your lenses actually need. Our best headlight restoration kits article compares three full kits for the heavy job, while this guide is the cleaning process itself: wash, polish, seal, and restore only the lenses that still need it. This guide is about cleaning the headlights already on the car — buying replacement headlight housings is a different job, not a cleaning step.
What Makes Headlights Go Cloudy and Yellow
Modern headlight lenses are polycarbonate plastic, not glass, and polycarbonate yellows in sunlight. Every lens leaves the factory with a UV-resistant hard coating, and that coating wears away over years of sun, heat, road salt and car washes. Once the coating is gone, the bare plastic oxidizes: the surface turns yellow, then hazy, then rough to the touch. Heat from the bulb speeds the process from the inside, and road grit sands the surface from the outside.
That is why knowing how to clean headlights is only half the job — cleaning alone never lasts without a seal. Polishing removes the oxidized layer and brings back clarity, but it also removes whatever is left of the factory coating, leaving bare plastic open to the sun. A UV coating like Keep Clear replaces that barrier, which is why the seal step matters as much as the polish step. Parked in the sun every day, an unsealed lens can haze again within months; a sealed lens holds its clarity far longer, because the coating takes the sunlight instead of the plastic.
Headlight Cleaning Mistakes to Avoid
The first headlight cleaning mistake is polishing a dirty lens. Road grit on the surface acts like sandpaper under the pad, and a polish worked over grit adds the very scratches you are trying to remove. Wash and dry the lens first, every time. The second mistake is skipping the masking tape: polish and coating overspray on paint and trim is hard to remove once it dries, and a few strips of tape around the lens take a minute.
The third mistake is working in direct sun or on a hot lens. Polish dries too fast, wipes off hard, and leaves haze instead of clarity; coating sprayed on a hot lens can dry patchy. Work in the shade, on a cool lens, one headlight at a time. The fourth mistake is expecting a polish to fix a cracked lens or a bulb problem: cleaning only fixes the outside of the lens, and a cracked housing or a dying bulb needs a different repair. And the fifth is skipping the seal step — a polished lens with no UV coating hazes again fast, and the whole job has to be repeated.
When Cleaning Is Not Enough
Sometimes a clean lens still throws a weak beam, and the problem is not the lens at all. If the lens is clear but the light is dim, the bulb itself may be worn out — bulbs dim gradually over years, and a fresh bulb can transform a headlight that cleaning never touched. Our how to replace a headlight bulb article walks through the swap, and if the beam still looks weak after a new bulb, a brighter bulb is the next step: our SEALIGHT vs Fahren LED headlight bulbs comparison covers two of the most common LED upgrades.
Cleaning also cannot fix a lens that is cracked, crazed deep inside the plastic, or fogged on the inside. Crazing — a web of fine cracks through the whole thickness of the lens — is damage to the plastic itself, not surface oxidation, and no polish removes it. Moisture inside the housing means the seal has failed, and the housing has to come off and be resealed or replaced. If the lens is cracked or the inside is fogged, cleaning the outside will not help, and the money is better spent on the repair or the replacement housing.
Who Should Clean Their Own Headlights — and Who Should Not
Clean your own headlights if: the lenses are hazy or yellowed on the outside, the housings are intact, and you have an hour and a shaded spot to work in. If you can follow the steps for how to clean headlights by hand, the job needs a wash, a polish, a coating and a few towels — no special tools, no lifting the car, no wiring. The result is visible the same afternoon, and the saving against a shop visit is the whole point of doing it yourself.
Clean with care if: the yellowing is deep and a polish alone leaves haze behind. The Chemical Guys kit covers the deeper step, but a lens that needs heavy correction takes patience and a test spot first, and a second pass is normal. Work a small area, inspect it in daylight, and only then commit to the whole lens.
Do not clean them yourself if: the lens is cracked, the housing is fogged on the inside, or the beam is weak even with a clear lens and a fresh bulb. Those are housing, seal or electrical problems, and polishing the outside will not fix them. A cracked housing needs a repair or a replacement, and a wiring fault needs a mechanic — cleaning is the wrong tool for either job.
The Verdict
The best way to clean headlights is the wash-polish-seal order: wash the lens, polish it with Meguiar’s PlastX, restore deeper yellowing with the Chemical Guys ceramic kit if the polish alone falls short, and seal the result with Meguiar’s Keep Clear coating so the clarity lasts. That order matches the problem — dirt first, haze second, protection last — and it keeps the job to a single session in the shade with no special tools.
Whichever products you choose, check three things before you order: whether each listing shows a live offer, whether the lens is hazy on the outside rather than cracked or fogged inside, and whether the lens has been washed and taped off first — clean on a cool lens in the shade, inspect after every pass, and seal it before you drive.
Frequently Asked Questions
How often should I clean my headlights?
Clean your headlights whenever the lens looks hazy or yellowed in daylight, and inspect them at least twice a year — once before winter and once before summer. A sealed lens holds its clarity far longer than an unsealed one, so the real schedule is set by the coating: once the UV coating wears off, the haze comes back, and it is time to polish and seal again.
Can I clean headlights with toothpaste?
Toothpaste can remove light surface haze, because it contains mild abrasives, but it is a poor way to clean headlights: it has no UV protection, so the haze comes back quickly, and it is easy to leave the lens patchy. A plastic polish like PlastX does the same job more evenly, and a UV coating afterwards is what keeps the lens clear.
Do I need to sand my headlights to clean them?
No — sanding is a restoration step, not a cleaning step. Lightly hazy or yellowed headlights usually clear up with a wash and a plastic polish, with no sanding at all. Sanding is only needed when the oxidation is deep enough that a polish alone leaves haze behind, and it should always be followed by a finer polish and a UV coating.
How long do clean headlights stay clear?
A polished lens with no UV coating can haze again within months, because the bare plastic is open to sunlight. A polished lens sealed with a UV coating holds its clarity far longer — the Keep Clear coating’s maker describes a full year of protection. The exact time depends on how much sun the car sees and whether it is parked outside every day.
Can I clean headlights without removing them?
Yes — headlight cleaning is done with the housings in place on the car. Wash the lens, tape off the paint around it, polish it by hand with a foam applicator pad, and spray the UV coating over the clean lens. Nothing has to be unbolted, and no wiring is touched at any point in the process.
Will cleaning my headlights make them brighter at night?
Yes, if the dimness comes from a hazy lens: a cloudy lens scatters the beam, and a clear lens sends it down the road, so the same bulb lights up more of the road after cleaning. If the lens is already clear and the beam is still dim, the bulb is the problem — a worn bulb dims gradually over years, and cleaning will not fix that.