Best Headlight Restoration Kits: A Headlight Repair Kit Guide for Cloudy Lenses
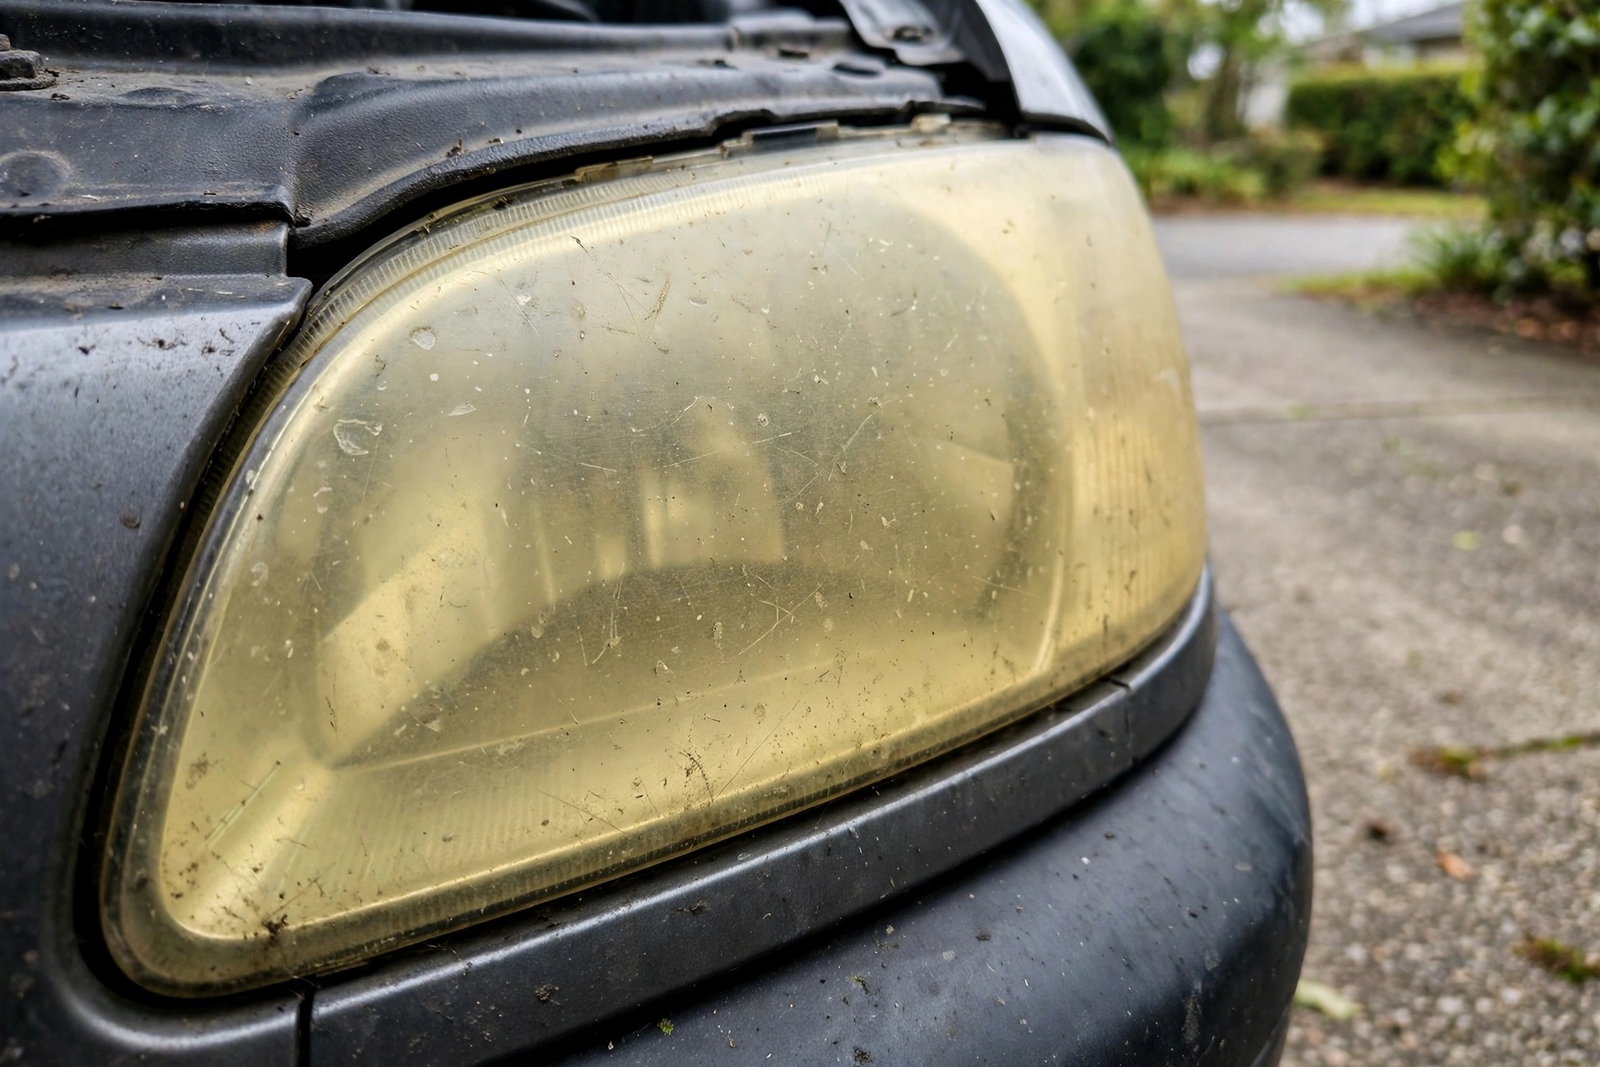
Cloudy headlights throw less light on the road, and the haze comes from the plastic lens itself: years of sun turn the surface yellow and rough, and no wash brings the clear lens back. A headlight repair kit works on the lens, sanding the damaged surface smooth, polishing it clear and sealing it against the sun. This roundup compares three kits on method, effort and sealant, so you can pick the one that matches your lenses.
Restoring is different from cleaning: cleaning takes dirt off the surface, while restoring takes the damaged plastic off the lens. A wash makes a dirty lens clean; only a headlight repair kit makes a yellowed lens clear again, and no kit here promises the result lasts forever.
The short answer: start with the 3M 39008 if you have a drill and want the most thorough sanding method, pick the SYLVANIA kit if you want a no-tools kit with a UV clear coat, and pick the CERAKOTE kit if you want a no-drill ceramic kit with no power tools. None of them fixes a cracked lens or a failed bulb.
As an Amazon Associate I earn from qualifying purchases.
Quick Pick: Best Headlight Restoration Kits Compared
| Pick | Product | Best For | Check Price |
|---|---|---|---|
| Drill-Powered Sanding Kit | 3M Headlight Lens Restoration System, 39008, 1 Kit | A drill-powered kit with sanding discs and rubbing compound, for drivers who have a drill and want the most thorough sanding method | Check Price on Amazon |
| No-Tools UV Clear Coat Kit | SYLVANIA Headlight Restoration Kit – Long-Lasting Headlight Repair Kit for Restoring to Like-New Condition – Surface Activator, Exclusive UV Coating, Clarifying Compound and More – No Tools Required | A no-tools kit with surface activator, sandpaper, clarifying compound and UV Block Clear Coat, for drivers who want a UV sealant without a drill | Check Price on Amazon |
| No-Drill Ceramic Kit | CERAKOTE Ceramic Headlight Restoration Kit, 10 Wipe Kit | A 10-wipe ceramic kit in 3 steps with no power tools, for drivers who want the simplest no-drill method | Check Price on Amazon |
Table of Contents
3M 39008: The Drill-Powered Sanding Kit
The 3M 39008 is the most hands-on kit in this roundup, and the one that does the most work on the lens. It is the 3M Headlight Lens Restoration System, model 39008, a drill-powered kit with a disc pad holder, six 500-grit gold sanding discs, four 800-grit white finishing discs, one Trizact refining disc and a bottle of rubbing compound. The discs fit a household drill, and the kit sands the yellowed surface off the lens in steps, from coarse to fine, then polishes it clear.
The drill is the difference. A drill spins the sanding disc faster and more evenly than a hand can, and the stepped grits take the lens from rough to smooth in stages: the 500-grit discs take the yellowed layer off, the 800-grit discs smooth the scratches, the Trizact disc refines the surface, and the rubbing compound polishes it. That is more steps than the other two kits, and more time per lens — but it is also the method that takes the most damaged plastic off, per the listing.
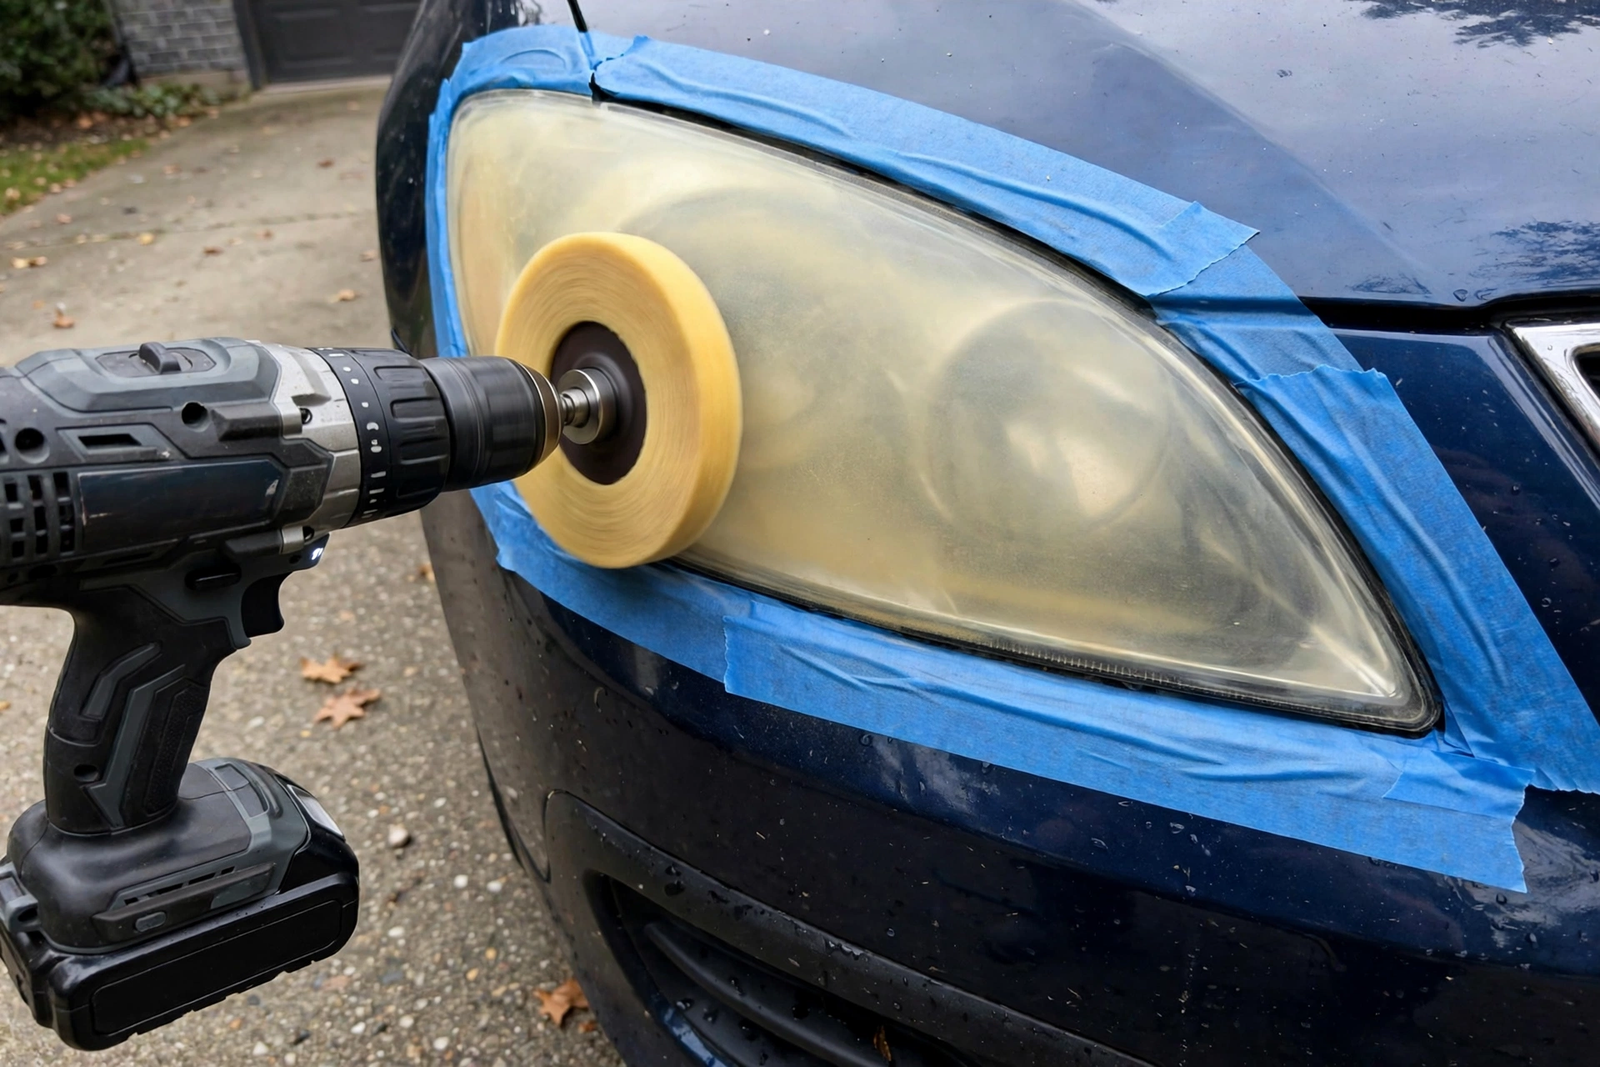
The 3M 39008 is the pick in this roundup for the driver with a drill and badly yellowed lenses: the most thorough sanding method here, with a real stepped grit sequence. The kit has no UV sealant wipe of its own, so the finish needs protecting after the polish — the listing is a restoration system, not a sealant, and the clarity it gives back is the listing’s claim, not a measured result. No kit was tested for this review.
3M Headlight Lens Restoration System, 39008, 1 Kit on Amazon: Drill-powered kit, model 39008, six 500-grit sanding discs, four 800-grit finishing discs, one Trizact refining disc, rubbing compound, UPC 051131390089.
Buy the 3M 39008 if: you have a household drill and your lenses are badly yellowed. Plan on protecting the finish after the polish.
SYLVANIA Kit: The No-Tools UV Clear Coat Kit
The SYLVANIA kit is the middle method in this roundup: no drill, hand sanding, and a UV clear coat as the last step. It is the SYLVANIA Headlight Restoration Kit, model HRK.BX, and its own listing calls it a long-lasting headlight repair kit for restoring lenses to like-new condition. The kit has a surface activator, a clarifying compound and an exclusive UV Block Clear Coat, and the listing says no tools are required.
The UV clear coat is what sets this kit apart. Sanding and polishing make a lens clear, but the sun yellows it again, and the clear coat is the layer that slows that return. The SYLVANIA kit puts the UV protection in the box as its last step, while the 3M kit leaves the sealing to you. The surface activator prepares the lens, the clarifying compound polishes it, and the UV Block Clear Coat seals it — that sequence is the listing’s description, and the long-lasting result is the listing’s claim, not a measured result.
The SYLVANIA kit is the pick in this roundup for the driver who wants a UV sealant without a drill: hand work only, and a clear coat at the end. It asks for more hand effort than the no-drill CERAKOTE kit, and less equipment than the drill-powered 3M kit. If your lenses are only lightly hazed, this kit is the balanced pick; if they are badly yellowed, the 3M sanding method takes more damaged plastic off.
SYLVANIA Headlight Restoration Kit – Long-Lasting Headlight Repair Kit for Restoring to Like-New Condition – Surface Activator, Exclusive UV Coating, Clarifying Compound and More – No Tools Required on Amazon: No-tools kit, model HRK.BX, surface activator, clarifying compound and exclusive UV Block Clear Coat.
Buy the SYLVANIA kit if: you want a headlight repair kit with a UV clear coat and no drill. Expect hand work on the lens.
CERAKOTE Kit: The No-Drill Ceramic Kit
The CERAKOTE kit is the simplest method in this roundup, and the only one that needs no power tools. It is the CERAKOTE Ceramic Headlight Restoration Kit, model AH-HLKITV, a 10-wipe kit in 3 steps with no power tools required. The listing says it brings headlights back to like-new condition with a ceramic coating, and that the ceramic layer protects the lens against the sun. The three steps do the work in order: oxidation-removing wipes first, a hand sanding kit second, and ceramic coating wipes last.
The ceramic coating is the claim that carries this kit. The listing says the ceramic layer lasts as long as you own the vehicle, and that is the manufacturer’s claim, not a measured result — no kit was tested for this review, and no coating lasts forever in the sun. What the wipe method does give you is the easiest job here: no drill, no mixing, just wipes and a small hand sanding kit in order. That makes it the pick for lightly hazed lenses and for drivers who want the job done in one short session.
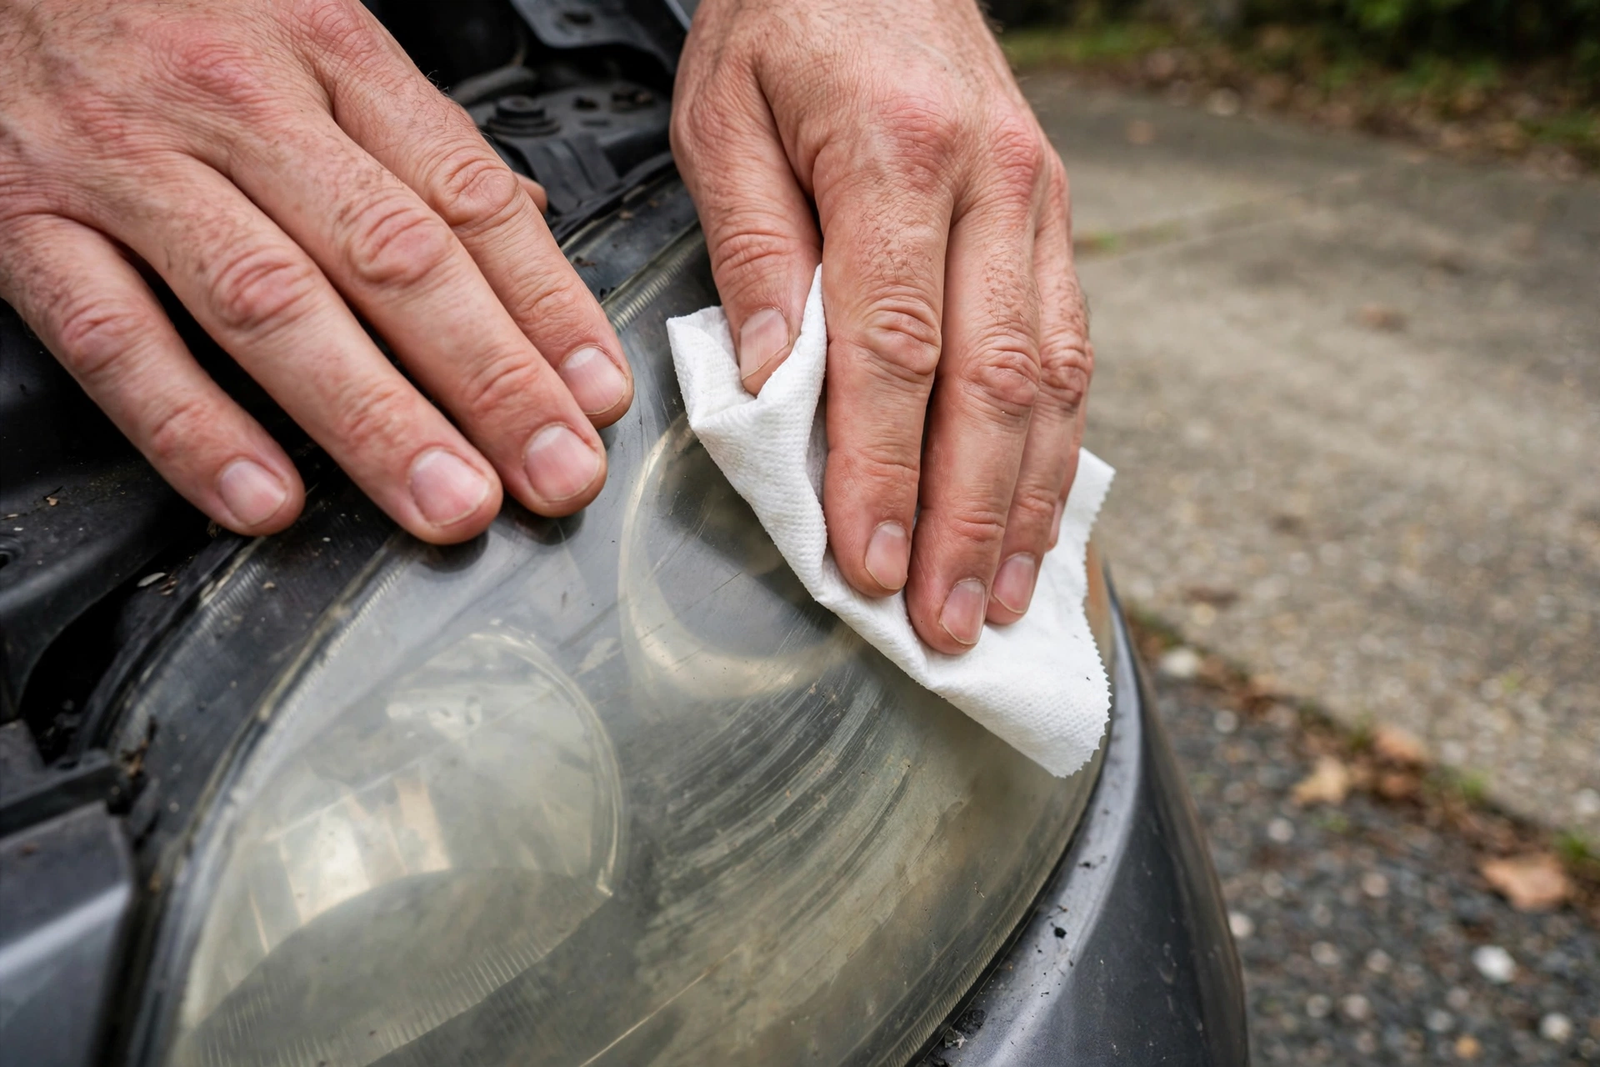
The CERAKOTE kit is the pick in this roundup for the driver who wants the simplest headlight repair kit: ten wipes, three steps, no tools. It is also the kit with the least sanding power of the three, so badly yellowed lenses may need the 3M drill method instead. The ceramic protection is the listing’s claim — treat it as a sealant that slows the haze, not as a permanent fix.
CERAKOTE Ceramic Headlight Restoration Kit, 10 Wipe Kit on Amazon: No-drill ceramic kit, model AH-HLKITV, 10 wipes in 3 steps, ceramic UV protection, no power tools required, UPC 850014615017.
Buy the CERAKOTE kit if: your lenses are lightly hazed and you want the simplest no-drill method with a ceramic sealant.
Cleaning vs Restoring: Different Jobs on the Same Lens
Cleaning and restoring sound alike, and they fix different problems. Cleaning takes dirt, bugs and road film off the surface of the lens: soap, water and a cloth, and the lens looks clean again. Restoring takes the damaged plastic off the lens itself: the sun turns the outer layer yellow and rough, and no wash can take that layer off, because the damage is in the plastic, not on it. A lens that stays yellow after a wash needs restoring, not another wash.
As a rough guide, wash the lens and look at it wet. If it looks clear when wet and cloudy when dry, the surface is rough and a restoration kit can help. If it looks yellow when wet too, the damage runs deeper and a kit may not bring it back. The still-undrafted how-to-clean-headlights guide will cover the cleaning job; this article covers the restoring job, and the two should not be confused — a cleaning guide cannot fix a yellowed lens, and a restoration kit is overkill for a dirty one.
Drill Kits vs No-Tools Kits: Which Method Fits You
The three kits here split into two methods: the 3M 39008 needs a household drill, and the SYLVANIA and CERAKOTE kits need no tools at all. A drill kit sands faster and more evenly, and it takes more damaged plastic off a badly yellowed lens — but it needs a drill, a power outlet or a charged battery, and a steady hand, because a sanding disc on a drill can cut too deep if it stays in one spot. A no-tools kit is slower per lens but asks nothing of you beyond hands and patience.
Pick by the lens, not by the tool. Badly yellowed lenses with a rough surface want the drill method: the stepped grits take the damage off in stages. Lightly hazed lenses want a no-tools kit: the SYLVANIA kit for a UV clear coat finish, or the CERAKOTE kit for the simplest no-drill job. And if the lens is cracked, or the bulb inside has failed, no kit of either kind helps — a cracked lens needs replacing, and a failed bulb needs a new bulb. Our how to replace a headlight bulb article covers the bulb side, and our SEALIGHT vs Fahren LED headlight bulbs comparison covers brighter bulbs for lenses that are already clear.
Sanding, Polishing and the UV Sealant: The Three Steps
Every headlight repair kit follows the same three steps, whatever the method: sand the damaged layer off, polish the lens clear, and seal it against the sun. Sanding takes the yellowed plastic off in stages, from coarse grit to fine, and the 3M kit shows the sequence plainly with its 500-grit, 800-grit and Trizact discs. Polishing smooths the sanded surface until the lens looks clear again, and the SYLVANIA clarifying compound and the 3M rubbing compound both do that job. Sealing is the step that protects the work: the SYLVANIA UV Block Clear Coat and the CERAKOTE ceramic coating both seal the lens, and the 3M kit leaves the sealing to you.
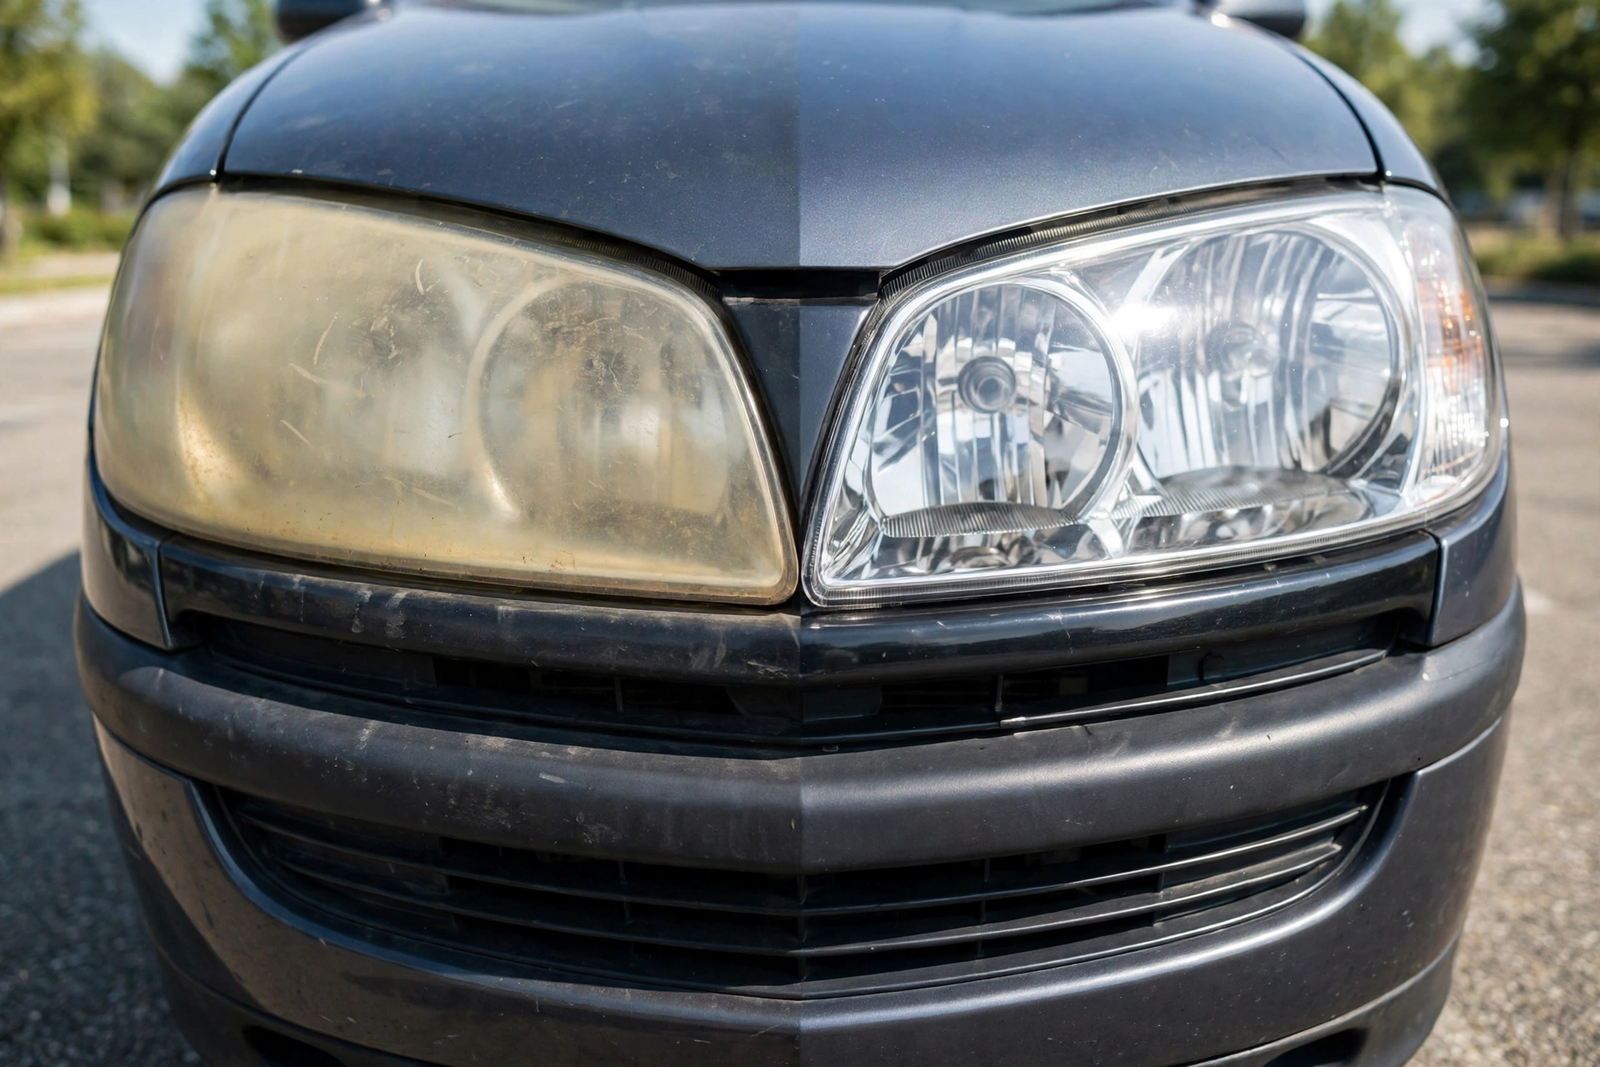
The sealant is the step most often skipped, and the step that matters most for how long the result lasts. A polished lens with no sealant yellows again fast, because the sun attacks the bare plastic. A sealed lens still yellows in time — no sealant stops the sun forever — but the sealant slows it down. That is why the kit with the sealant in the box is worth more than the kit without one, unless you already have a sealant of your own. The 3M listing covers sanding and polishing, and the SYLVANIA and CERAKOTE listings cover all three steps. Our best fog lights article covers the fog lights, which haze the same way and take the same treatment.
How Long Do Restored Headlights Stay Clear?
Restored headlights stay clear for months, not forever, and the honest answer is that nobody can put a number on your car. The sealant slows the haze coming back, but the sun keeps working on the lens every day it sits outside, and a car parked in the sun yellows faster than a car parked in a garage. The CERAKOTE listing says its ceramic coating lasts as long as you own the vehicle, and the SYLVANIA listing calls its kit long-lasting — both are the manufacturers’ claims, not measured results, and neither was tested for this review.
What you can control is the aftercare. Park in shade or a garage when you can, wash the lenses with the car instead of letting road film bake on, and watch for the first sign of haze returning — a light haze caught early takes a quick polish, while a lens left to yellow again needs the full sanding sequence. Restoring is maintenance, not a one-time fix: a lens restored once will need restoring again.
Headlight Repair Kit Mistakes to Avoid
The first headlight repair kit mistake is restoring a lens that only needs washing: a dirty lens looks cloudy, and a wash may be all it needs. The second is skipping the masking tape — sanding discs and compounds scratch paint, so mask the paint around the lens before you start (the 3M kit does not include tape, so supply your own). The third is sanding dry when the kit says wet, or sanding in one spot with a drill, which cuts a flat patch into a curved lens. Keep the disc moving, and keep the lens wet if the kit calls for it.
The fourth mistake is skipping the sealant: a polished lens with no UV coat yellows again fast, and the whole job has to be done again. The fifth is expecting a kit to fix a cracked lens or a failed bulb — a crack needs a new lens, and a dim bulb needs replacing, not polishing. And the sixth is working in direct sun: compounds dry too fast on a hot lens, so work in shade and let each step do its job.
Who Should Buy a Headlight Restoration Kit — and Who Should Not
Buy a headlight repair kit if: your lenses are yellowed or cloudy after a wash, your night driving feels dimmer than it used to, and the lenses are not cracked. A kit costs far less than new headlight housings, per 3M, and the job takes about an hour — 3M says its kit needs as little as an hour.
Buy with care if: your lenses are only lightly hazed, or you have never sanded anything. A lightly hazed lens may only need the no-drill CERAKOTE kit, and a first-timer should start with a no-tools kit before trying a drill. If the haze is on the inside of the lens, no kit helps — the lens has to come apart, and that is a shop job.
Do not buy a headlight restoration kit if: the lens is cracked, the bulb has failed, or the lens is clear already. A cracked lens needs replacing, a failed bulb needs a new bulb, and a clear lens needs washing, not sanding. Restoring a clear lens takes good plastic off for nothing.
The Verdict
The best headlight restoration kit is the one whose method matches your lenses. The 3M 39008 is the pick for badly yellowed lenses and drivers with a drill: the most thorough sanding method here. The SYLVANIA kit is the pick for a no-tools kit with a UV clear coat in the box. And the CERAKOTE kit is the pick for the simplest job: ten wipes, three steps, no tools, and a ceramic sealant.
Whichever kit you choose, check three things before you order: whether the lens is yellowed or only dirty, whether you have a drill if the kit needs one, and whether the kit includes a UV sealant — a polish without a sealant yellows again fast. For the wider routine that keeps your lights working, our car maintenance checklist article covers the rest of the maintenance list.
Frequently Asked Questions
How long do restored headlights stay clear?
Months, not forever — the sealant slows the haze coming back, but the sun keeps working on the lens every day it sits outside. The CERAKOTE listing says its ceramic coating lasts as long as you own the vehicle, and the SYLVANIA listing calls its kit long-lasting, but both are the manufacturers’ claims, not measured results. Park in shade when you can, and catch the first haze early with a quick polish.
Do I need a drill for a headlight restoration kit?
Not always. The 3M 39008 is a drill-powered kit: its sanding discs fit a household drill. The SYLVANIA kit and the CERAKOTE kit need no tools at all — the SYLVANIA kit works by hand with a surface activator and clarifying compound, and the CERAKOTE kit works by hand in three steps — wipes, a hand sanding kit, and a ceramic coating. Pick the drill method for badly yellowed lenses and a no-tools kit for lightly hazed ones.
Can a headlight restoration kit fix yellowed headlights?
Yes, if the yellowing is in the outer layer of the plastic lens. A headlight repair kit sands the damaged layer off, polishes the lens clear and seals it, which takes the yellow with it. If the lens looks yellow when wet too, the damage runs deeper and a kit may not bring it back. A cracked lens cannot be fixed by any kit — it needs replacing.
Is sanding my headlights safe?
Yes, if you follow the kit and mask the paint first. Sanding discs and compounds scratch paint, so mask the paint around the lens before you start, keep the disc moving so it does not cut a flat patch into the curved lens, and keep the lens wet if the kit calls for it. Work in shade, not direct sun, because compounds dry too fast on a hot lens.
Do headlight restoration kits work on fog lights and taillights?
Yes — the same hazed plastic is used on fog lights and taillights, and the same sanding, polishing and sealing steps apply. The 3M listing says its kit works on plastic lenses including headlights, taillights and fog lights. Work one light at a time, mask the paint around it, and seal it the same way you seal the headlights.
Should I clean or restore my headlights?
Clean them first, then decide. Cleaning takes dirt, bugs and road film off the surface, and a lens that looks clear after a wash only needed cleaning. If the lens stays yellow or cloudy after a wash, the damage is in the plastic itself, and only restoring takes that layer off. A cleaning guide cannot fix a yellowed lens, and a restoration kit is overkill for a dirty one.